AICE Media Studies Blog
Monday, April 9, 2018
Monday, April 2, 2018
Thursday, March 29, 2018
Sound Effect Summary
We have had to get creative with our sounds. We used YouTube to find sound effects that we liked, then experimented with ways to remake them ourselves. Some of these were easy, but some weren't so much.
- Running Water: my sink turned on
- Transition Sound: ripping a sheet of paper
- Based off of the Dawn of the Dead title transitions.
- Flatline Sound: Anne Marie's car put into reverse
- Door creak: an actual creaky door
- Scream: courtesy of NAT
The flatline sound was probably the most random sound effect we had to come up with. I was literally laying in bed last night at about 9:30 and had a lightbulb moment, which I immediately sent into our group chat. My boyfriend has a golf cart, and it makes a drawn out, high pitched noise when you shift it into reverse. It is almost identical to how an actual medical flatline sounds, and it's super easy to get. So that was the first idea. But, his golf cart is broken, so I couldn't get it. Then, Anne Marie remembered that her car makes a similar sound when it is put into reverse. So, the sound is now derived from that. It is kind of faint, so I had to turn it up to like, 300% but it works!
The water running was probably the easiest sound effect to record. I literally walked into my bathroom, turned my sink on, and hit record. The only reason we did this was because the sound of the water running on the actual video clips sounded weird, and because the sound isn't as loud and it kind of echoed, and on the clip you can hear some talking in the background. Due to us recording just the audio clip, however, we were able to place the clip in all of the areas we needed without worrying about if the volume of two different clips matching up and what not.
The sound I am most proud of is the transition sound. The ripping sheet of paper was so simple, and the sound turned out to have great quality and sounded super cool. We put it at the beginning of every transition in the opening, and it just adds that extra startling nature to the sequence.
Tuesday, March 27, 2018
Post-Break Recap
So over spring break, in addition to the stuff mentioned in my last post, Nat was able to add some flash-forward inserts in order to allude to the murder. Meaning, in the beginning, there are jump cuts to post-murder shots, to set more of an eerie tone and to get the audience involved with what is going to happen. We also added some time stamps while we were in class, in order to make the time difference more apparent. We are still working on certain sounds, but we were able to record and insert things like water running, and ripping paper for transition sound effects.

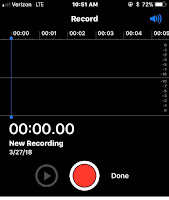
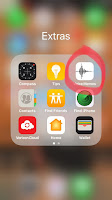
 For the sound effects, I have learned that even if it sounds really quiet when you first record it, once you put it on iMovie you can really adjust it to the volume you need. For example, the water running that I recorded was fairly quiet, but once we uploaded it we were able to adjust the volume to where you could hear it over the music, but it wasn't overly loud. The main reason the sound wasn't very loud to begin with was because it was recorded using the Voice Memos app that comes on every iPhone. This app is really useful, but it doesn't have the volume aspect that we originally needed, due to the location of the microphone on my phone. To get sounds, we have to make sure the microphone is as close as possible to what we need to record. I learned this app is actually fairly useful, and I will probably be utilizing it in my CCR if I need to use voiceovers at some points.

 For the sound effects, I have learned that even if it sounds really quiet when you first record it, once you put it on iMovie you can really adjust it to the volume you need. For example, the water running that I recorded was fairly quiet, but once we uploaded it we were able to adjust the volume to where you could hear it over the music, but it wasn't overly loud. The main reason the sound wasn't very loud to begin with was because it was recorded using the Voice Memos app that comes on every iPhone. This app is really useful, but it doesn't have the volume aspect that we originally needed, due to the location of the microphone on my phone. To get sounds, we have to make sure the microphone is as close as possible to what we need to record. I learned this app is actually fairly useful, and I will probably be utilizing it in my CCR if I need to use voiceovers at some points.
Something we need to work on is making our actual title slide more prominent. Meaning, we need to make sure that it is differentiated from the rest of the credits. We could try downloading another font, or change the color. Changing the color would probably be the easiest route, but may not achieve the level of differentiation that we need.
**update: I ended up changing both the font AND the color.**
| Our Font |
Thursday, March 15, 2018
Processing
Today, my mission was mainly sound. I was able to use a converter website in order to get the music from the video to an MP3 file, and then downloaded to the desktop. This wasn’t too hard to do, the hardest thing was finding a free website that I could use. Once I accomplished that, all I had to do was copy and paste the YouTube link, then hit “download”. After that, the file was converted to the MP3 file and downloaded to the desktop, where I could then drag it into iMovie and insert it into the project.
Once I had it inserted, I had to shorten the song so that it fit the length of the clip only. So, I just cropped the song, which was pretty simple. But, this resulted in a really rough and abrupt ending to the song, which was off putting. I knew that I had to fade the clip out, but I really didn’t know how. Therefore, I had to go online and find a video on how to fade out. To watch, click here. The consequence of doing that was the music flowed better, and made the sound overall more pleasing.
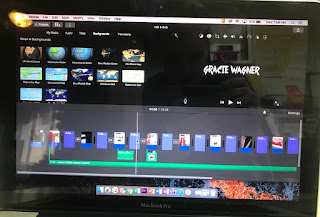
 On a different note not relating to sound, scary fonts are hard to find. The generic fonts that come on computers are... generic. So, I used the website Urban Fonts to find an appropriate horror film font, and I had to download it to the desktop. I thought it was going to be easy, but I had to legitimately download the font 3 times before it saved to the computer, and was available for use. But, it was worth the process because the mood completely changed. The picture to the left shows the font in the small screen in the right corner.
Once I had it inserted, I had to shorten the song so that it fit the length of the clip only. So, I just cropped the song, which was pretty simple. But, this resulted in a really rough and abrupt ending to the song, which was off putting. I knew that I had to fade the clip out, but I really didn’t know how. Therefore, I had to go online and find a video on how to fade out. To watch, click here. The consequence of doing that was the music flowed better, and made the sound overall more pleasing.
 On a different note not relating to sound, scary fonts are hard to find. The generic fonts that come on computers are... generic. So, I used the website Urban Fonts to find an appropriate horror film font, and I had to download it to the desktop. I thought it was going to be easy, but I had to legitimately download the font 3 times before it saved to the computer, and was available for use. But, it was worth the process because the mood completely changed. The picture to the left shows the font in the small screen in the right corner.
Source Links:
https://macmost.com/fade-out-background-music-in-imovie.html
Wednesday, March 14, 2018
Cutting it Up
So yesterday we learned from a fellow classmate how to transfer videos from YouTube to iMovie for the project. For our film pitch project (see earlier post) we pitched our movie idea to Blumhouse Production Company. Because of that, we wanted to have the Blumhouse opening/logo in the beginning of our film. So the big project was getting the video converted to the project. We had to copy the link of the video to a YouTube converter, and convert it to an Mp4, then download in to the computer. That is the basic shortened version of what we did, and we are going to give credit to Blumhouse in the title sequence. The purpose of doing this is to make the opening more authentic seeming, because it will be just like a big-time movie opening. In addition, the Blumhouse opening is horror-themed, so it helps to set the mood for our project-- see below.
This skill will also be beneficial to use when we have to get music onto our iMovie from YouTube. Although the actual sound effects we have will be original, we need the music for the background sound for the entirety of the introduction. This music, like the logo, will help to set a mood/tone for the project. We spent a lot of the class period yesterday browsing through possible soundtracks on YouTube, and only found two so far that are possibilities. That is something that we will be focusing on a lot more over spring break.
This skill will also be beneficial to use when we have to get music onto our iMovie from YouTube. Although the actual sound effects we have will be original, we need the music for the background sound for the entirety of the introduction. This music, like the logo, will help to set a mood/tone for the project. We spent a lot of the class period yesterday browsing through possible soundtracks on YouTube, and only found two so far that are possibilities. That is something that we will be focusing on a lot more over spring break.
Monday, March 12, 2018
Sound Creation
I mentioned sound in my last post, and how we are still working on it and we are still trying to figure out how to even make the sounds. We were shown this video in class, and honestly it has become one of my favorite videos ever. And, when I went on YouTube and searched "how to make movie sounds", this was still one of the first videos that popped up, probably due to how informational it is.
This shows the ultimate science behind making sounds, and the creativity surrounding the making of them. This provides some good ideas on how to make sounds that are close to what we need. Also, it helps to help us embrace our own creativity to make our sounds realistic and good quality. Sounds will be the main focus over spring break, because we will have the time to record them and everything. Right now, we have hardly any sound in our project, as we have been focusing on things like transitions and color correction. We have gotten most of our credits down, and chose to go the route of using a filter to change our coloring.
This shows the ultimate science behind making sounds, and the creativity surrounding the making of them. This provides some good ideas on how to make sounds that are close to what we need. Also, it helps to help us embrace our own creativity to make our sounds realistic and good quality. Sounds will be the main focus over spring break, because we will have the time to record them and everything. Right now, we have hardly any sound in our project, as we have been focusing on things like transitions and color correction. We have gotten most of our credits down, and chose to go the route of using a filter to change our coloring.
Subscribe to:
Comments (Atom)
-
We plan to utilize a smaller, independent production company. This allows us to be more creative with what we choose to do, and also means w...
-
As mentioned in a previous post, the main age category who views horror movies consists of 18-30 year-olds. This category makes up 60% of th...
-
Okay, so the biggest question is what type of murder will be occurring. As of right now, we do not have an agreement as to what type of murd...


